Contents 

Welcome
Quick start
Quick start guide
Choosing an output type
Importing photos and video
Importing background Music
Organizing the menu
Authoring the disk
Authoring a video
User guide
How to Create, Open, and Save projects
Creating a new project file
Opening a project File
Saving a project File
Output type
Output aspect ratio
How to add photos and video to your slideshow
Importing images & video
Adding a blank slide
Rearranging slides
Removing slides
Setting the slideshow menu thumbnail (Optical output types only)
Slideshow settings
Slideshow settings
Disk chapter markers
How to edit and decorate a slide
Rotating a slide
Setting display length
Setting the transition effect between slides
Duplicating a slide
Editing a slide's input media
Adjusting an image's colors
Cropping an image
Orientaing a decoration
Adding an outline mask
Trimming a video
Changing the text on a template design
Slide tab options
Using a pre-design slide template
Setting the background
Decorating with text, images and video
Adding text
Editing the text font style
Adding images, video or clipart
Manually selecting a decoration
Setting the time region a decoration is shown for
Setting the exact position of a decoration
Setting the transparency of a decoration
Setting the exact rotation of a decoration
Additional decoration options
Adjusting the pan & zoom regions
Adding filters
Adding a border
Ordering the decoration layers
Adding a motion effect to a decoration
How to add background music
Importing music
Removing music
Rearranging the background music order
Making a music track end on a slide
Trimming a background music track
Synchronize slideshow to the background music
Advance audio options
How to add a narration to your slideshow
Recording a narration for your slideshow
Rearranging narrations
Adding a narration or sound from an audio file
How to preview a slideshow
Previewing a slideshow
How to organize the menu disk structure (Optical output types only)
The PhotoVidShow disk structure and editor
Creating a new slideshow album
Deleting a slideshow album
Moving a slideshow
Changing the menu title or slideshow thumbnail text
Creating a new sub menu
Importing a slideshow from another project
How to set a menu theme (Optical output types only)
Setting menu background image and music
Setting menu layout and button style
Setting menu duration
Adding further decorations and altering a menu
Setting navigation button style
Setting the disk highlight style
How to author your project
Encoding with motion blur
How to create a video from your slideshow
Creating a video from your slideshow
How to burn your project to DVD, Blu-ray or CD
Setting the output TV standard
Setting the Blu-ray resolution and fps
Reduce output to TV safe region
Ignoring menus
Including original material on the disk
Setting the disk image folder
Selecting a writer
Other editor options
Top tool bar options
Relinking project files
Undo and Redo
Un-installing
Contact

PhotoVidShow user manual

Prev Page Next Page

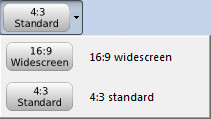
Output aspect ratio

Aspect ratio in a nutshell means the ratio of the width to the height of the image on a television screen or display.

The output aspect ratio of your slideshows can be set in the top tool bar. Set this to the aspect ratio which best represents the screen or display the slideshows will ultimately be played on. I.e. most televisions and displays are 16:9 widescreen, so by default PhotoVidShow selects this option.

Most digital photographs, however, are taken at an aspect ratio of 4:3 (e.g. a 3.2 mega pixel photo would be stored as 2048 pixels horizontal and 1536 pixels vertical, for every 4 pixels horizontal there are 3 vertical). Widescreen televisions have an aspect ratio of 16:9, so to overcome this, PhotoVidShow may add black borders on the side or set up a pan zoom such that the whole screen area is still filled.

Tip:With the use of pan and zoom you may be able to create a 16:9 widescreen DVD with no black side borders with 4:3 aspect ratio photos.


Converted from CHM to HTML with chm2web Pro 2.85 (unicode)